Reading “Raymarching - Primitives”
Shaders and 3D rendering have a very steep learning curve. There isn’t a common or obvious way to build knowledge step by step, and it takes learning from multiple resources and examples. Shadertoy is one of the best resources with tons of cool demos with publicly available code. However, understanding this demo code can often be daunting. There are many techniques to grasp, and it’s often difficult to understand what’s happening in the code at first glance.
シェーダーと3Dレンダリングの学習は険しい道のりです。知識を体系的に積み上げる定番の方法はなく、多様な資料や例を参考に学ぶ必要があります。Shadertoyは最良のリソースの一つで、数多くの優れたデモがコード付きで公開されています。しかし、そのデモコードの理解は往々にして困難です。習得すべきテクニックが多岐にわたり、一見しただけではコードの動作を把握するのが難しいことも少なくありません。
On this page, we take one of the best classic demos by Inigo Quilez and try breaking it down step by step. This demo is more than 10 years old, but still is great for learning since it is very well structured and includes various techniques to improve the quality of rendering.
このページでは、Inigo Quilezによる古典的な名作デモの1つを取り上げ、段階的に解説していきます。このデモは10年以上前のものですが、よく構造化されている上に様々な技術が含まれているので、レンダリングの品質を上げるため技術を学ぶには今でもとても良い素材です。
To follow the discussions, you need to understand the basics of 3D rendering with ray marching. If you’re unfamiliar with ray marching, the Projection and 3D Rendering プロジェクションと3Dレンダリング pages may be able to help.
このページで取り上げる内容を追うには、レイマーチングによる3Dレンダリングの基礎を理解している必要があります。レイマーチングに馴染みがない場合は、Projection and 3D Rendering プロジェクションと3Dレンダリングのページが参考になるかもしれません。
To make things worse for learners, many shader programmers prefer very abbreviated variable names and dense mathematical expressions (which is thought to improve performance). Compare the examples below. These two do the exact same thing.
学習者にとってさらに厄介なのは、多くのシェーダープログラマーが極端に簡略化された変数名や凝縮された数式を好むことです(これがパフォーマンス向上につながると考えられています)。下の例を比べてみましょう。これらは全く同じ処理を行っています。
Explicit and easy to follow but verbose
明示的で理解しやすいが冗長
vec3 lightDir = normalize(lightPosition - surfacePosition);
float intensity = max(dot(normal, lightDir), 0.0);
color += diffuseColor * intensity;
Compact, but hard to understand for learners
コンパクトだが、学習者にとっては理解が難しい
co += cd * max(dot(n, normalize(lp - sp)), 0.0);
The demo
デモ
Above is the demo ported to CodePen. The shader part is basically the same as the original, but I’ve made a few modifications:
-
I’ve simplified the code where possible, and renamed variables for clarity.
-
I removed the antialiasing to simplify the
main()function. You can find a version with antialiasing here, which takes multiple samples with slight offsets for each pixel and averages the results to soften the ragged edges. -
I’ve added toggles for various rendering techniques to make it easy to isolate and study each, seeing how they contribute to the final result.
上にあるのは、デモをCodePenに移植したものです。シェーダー部分は基本的にオリジナルと同じですが、いくつかの修正を加えています:
-
可能な場所ではコードを簡略化し、明確さのために変数名を変更しました。
-
main()関数を簡略化するためにアンチエイリアシングを削除しました。アンチエイリアス付きのバージョンはここで確認できます。これはピクセルごとに場所を少しずつずらした複数のサンプルを取り、結果を平均化することでギザギザのエッジを滑らかにします。 -
様々なレンダリングテクニックに対してON/OFF切り替えをつけて、それぞれが最終結果にどのように貢献しているかを見ながら個別に研究できるようにしました。
The main function main関数
Let’s start from the main() function. The main function can be roughly separated into the sections below.
-
Camera set up
-
Primary ray direction
-
Additional ray directions for ray derivatives
-
Rendering
-
Gamma correction
main()関数から始めましょう。main関数は大まかに以下のセクションに分けることができます。
-
カメラのセットアップ
-
主となるレイの方向
-
微分のための追加のレイの方向
-
レンダリング
-
ガンマ補正
Camera setup
カメラのセットアップ
Positions of all the objects in this demo, including the camera, are represented in a 3D coordinate system. We call this system the World Space.
カメラを含めて、このデモに登場するすべてのオブジェクトの位置は、3次元座標系で表わされます。この座標系をワールド空間と呼びます。
The camera rotates around the object. cameraPosition represents the camera’s position in the World Space. cameraTarget represents a point that the camera is looking at. This is used to determine the camera’s orientation.
カメラはオブジェクトの周りを回転します。cameraPositionはワールド空間におけるカメラの位置を表します。cameraTargetはカメラが向いている点を表し、カメラの向きを決めるのに使用されます。
// Camera setup
float cameraAngle = 0.1 * time;
vec3 cameraTarget = vec3(0.0, -0.75, -0.0);
vec3 cameraPosition = cameraTarget + vec3(4.5 * cos(cameraAngle), 2.2, 4.5 * sin(cameraAngle));
Primary ray direction
主となるレイの方向
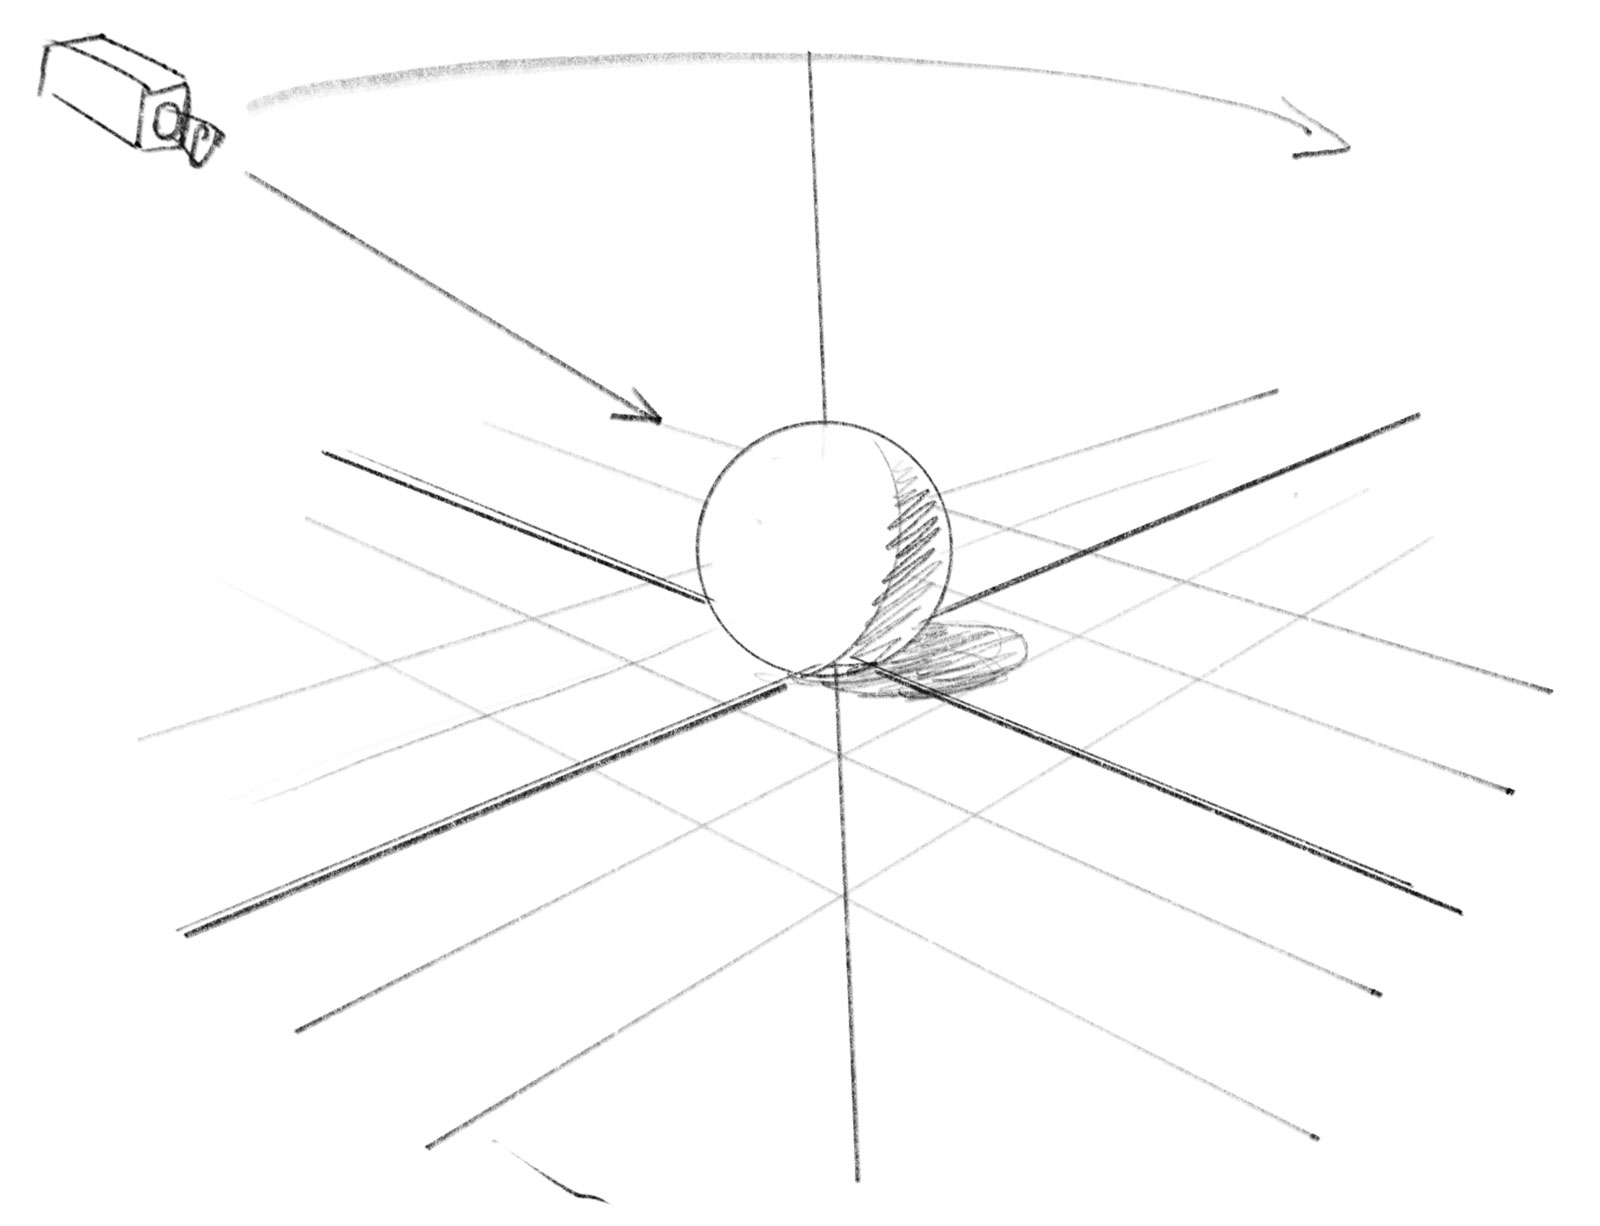
The most fundamental idea of ray marching is to cast rays from the camera toward the scene to detect objects. Each ray is defined by the origin, which is the position of the camera and the direction the ray points to or head toward.
レイマーチングの最も基本的な考え方は、カメラからシーンに向かってレイを飛ばしてオブジェクトを検出することです。それぞれのレイは、カメラの位置である原点と、レイが向かう方向によって定義されます。
The main() function first defines the direction of the ray in another coordinate system than the World Space. This system has the camera’s position as its origin, and the z-axis aligns with the camera’s viewing direction.
main()関数はまず、ワールド空間とは異なる座標系でレイの方向を定義します。この座標系では、カメラの位置が原点となり、z軸がカメラの視線方向と一致します。
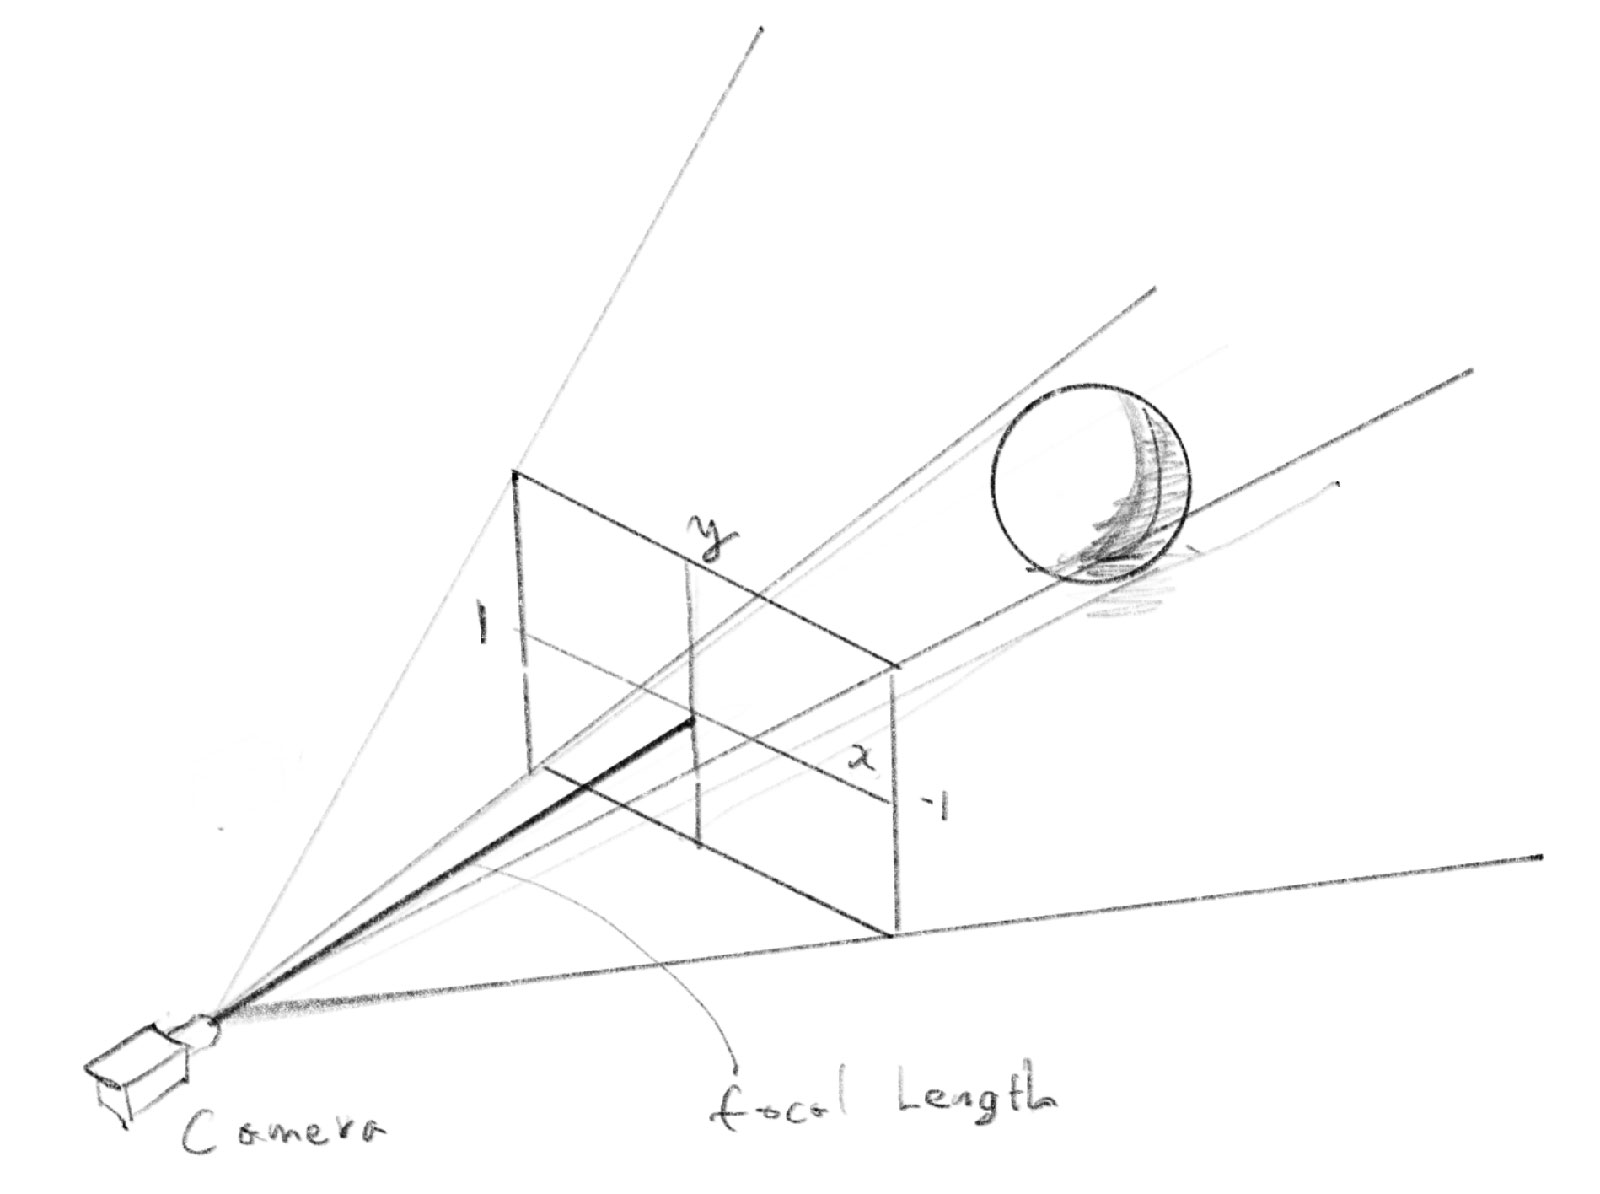
The direction of the ray is first calculated in the Camera Space. p is based on the position of the current pixel on the screen (fragCoord), but is adjusted (normalized) so that the center becomes (0, 0) and the screen’s left edge is at x: −1.0, and its right edge is at x: 1.0. The focalLength represents the distance between the camera and the screen.
レイの方向はまずこのカメラ空間で計算されます。pは現在のピクセルの画面上の位置(fragCoord)に基づいていますが、中心が(0, 0)になり、画面の左端がx: -1.0、右端がx: 1.0になるように調整(正規化)されています。focalLengthはカメラと画面の間の距離を表します。
The setCamera function takes the positions of the camera and the target, and returns a matrix that converts positions from Camera Space to World Space.
setCamera関数はカメラとターゲットの位置を受け取り、カメラ空間からワールド空間へ位置を変換する行列を返します。
mat3 cameraToWorld = setCamera(cameraPosition, cameraTarget);
Breakdown of the setCamera function setCamera関数の解説
normalize(vec3(p, focalLength)) is the direction of the ray in the camera space, and by transforming it with the cameraToWorld matrix above, it is converted to the direction in the world space.
normalize(vec3(p, focalLength))がカメラ空間におけるレイの方向です。これを上のcameraToWorld行列によってワールド空間における方向に変換します。
vec2 p = (2.0 * fragCoord - uResolution.xy) / uResolution.y;
const float focalLength = 2.5;
vec3 rayDirection = cameraToWorld * normalize(vec3(p, focalLength));
Additional ray directions for ray derivatives
微分のための追加のレイの方向
Two additional rays are calculated for pixels just one pixel off in both x and y directions. These are used to calculate derivatives, meaning the rate of change in world space relative to the offset on the screen. We will examine this more closely on the Drawing the checker pattern チェック模様を描く page.
x方向とy方向に1ピクセルずつずらした2つの追加レイを計算します。これらは微分、つまり画面上の位置変化に対するワールド空間での位置の変化率を得るために使用します。この詳細についてはDrawing the checker pattern チェック模様を描くのページでさらに深く掘り下げます。
vec2 px = (2.0 * (fragCoord + vec2(1.0, 0.0)) - uResolution.xy) / uResolution.y;
vec2 py = (2.0 * (fragCoord + vec2(0.0, 1.0)) - uResolution.xy) / uResolution.y;
vec3 rayDirectionXOffset = cameraToWorld * normalize(vec3(px, focalLength));
vec3 rayDirectionYOffset = cameraToWorld * normalize(vec3(py, focalLength));
Rendering
レンダリング
All the rendering logic is encapsulated in the render() function. We will break down this function on the following pages.
レンダリングのロジックはすべて render() 関数に含まれています。この関数の詳細は以降のページで説明します。
vec3 col = render(cameraPosition, rayDirection, rayDirectionXOffset, rayDirectionYOffset);
Gamma correction
ガンマ補正
Lastly, the demo applies gamma correction to adjust the brightness.
col = pow(col, vec3(1.0 / 2.2));
Understanding the rendering process
レンダリングのプロセスを理解する
Now that we’ve seen the overall structure, let’s dive into the main rendering process.
全体の構造が把握できたので、メインのレンダリングプロセスに踏み込んでいきましょう。